Animation Editor
Last updated 10.01.2024
The Animation Layer allows you to add your own custom animated effects to your peripheral lights. To edit this animation, the Animation Editor used. This is a powerful tool, and fairly easy to use once you understand how it works. As with all unfamiliar things however, it may be daunting at first.
Concepts and Definitions
Before getting into the guide itself, let me define some of the concepts and features that are required to fully understand how the animations work.
- Each frame, the animation is drawn onto a Canvas which is then sent to your connected peripherals. The canvas is a rectangle with a height and a width, this size of which depend on the position and size of the peripherals. Anything drawn to the canvas will be drawn at a specific point on the canvas, with
x=0, y=0being the coordinate of the top left. - An animation is built up of one or more Animation Tracks. Each of these tracks can represent a single shape (e.g. rectangle, filled circle, etc.)
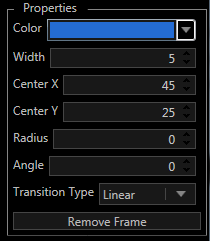
- Each shape has a number of Properties, depending on what sort of shape they are. For example, a circle has
radius,center x,center y,colorandwidthproperties. These properties determine how the shape will be rendered to the canvas. - Each animation track will have one or more Keyframes which are points on the timeline where you can set the properties of a shape. The keyframes do not have to line up on each track. For example one track may only have one keyframe while another may have ten.
- Between keyframes, the properties of a shape on a track will interpolate, forming a smooth transition.
The Editor
With that out of the way, lets move on to the creation of an animation. To open the animation editor, first add an animation layer to your profile. On the layer settings, click on the “Edit Animation” button. When you first open the animation editor you will be presented with a screen that looks like this:
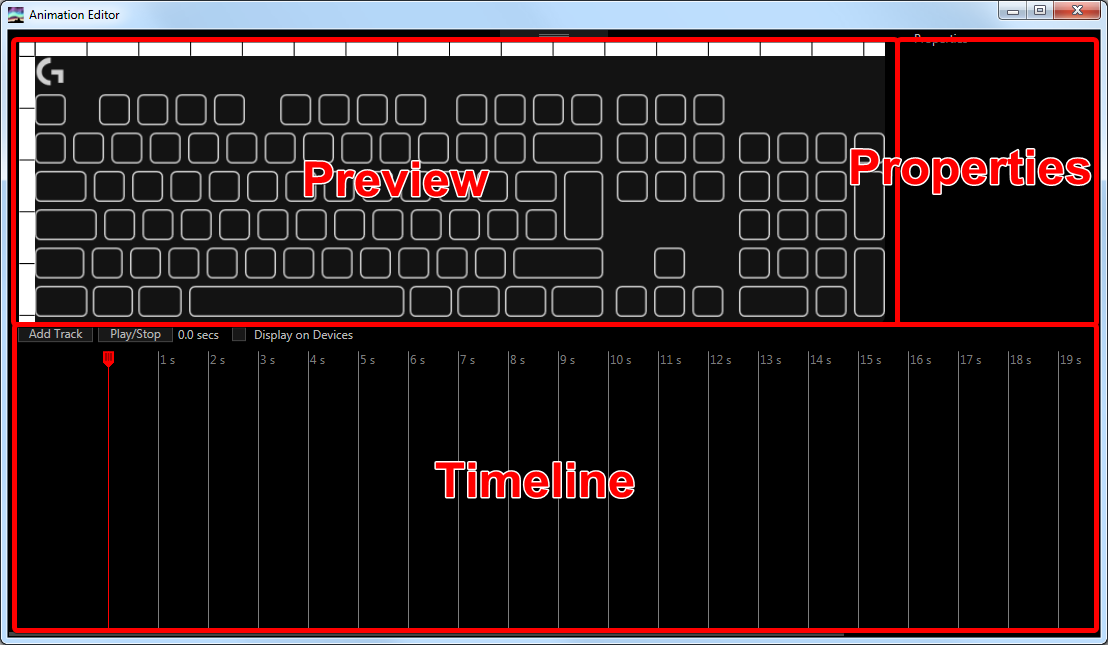
There are 3 main areas to the editor:
- The timeline which shows the tracks that currently make up the animation as well as also containing a seek line (the vertical red line) which dictates which how far through the animation the preview is.
- The preview area which shows a skeleton of your peripheral setup and the various shapes that make up the animation at the given time.
- The property editor which, when a keypoint is selected, allows for editing the properties of that shape for that keypoint.
Creating an Animation
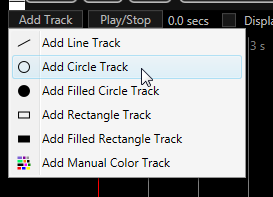
First we need to add a track by clicking on the “Add Track” button just above and to the left of the timeline, then choosing the type of shape we wish to add. The manual color track allows you to set individual colors of the keyboard (see Closing Notes), rather than using shapes; the other tracks should be self-explanatory. For the purpose of the tutorial, I will add an (unfilled) circle track.
You should now see a new row has appeared in the timeline. This is the new shape we’ve just created. The left-most grey box shows the name of the track, a delete button and an icon to indicate the type of the track. If you so desire you can double click on the name of the track to change it to something more helpful, though this has no effect on the actual animation itself.
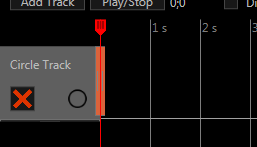
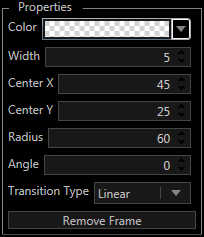
Next to the grey box you will see a pair of colored rectangles. These represent a keyframe on the track, the color being indicative of the color of the shape at that keyframe. Clicking this keyframe, we can edit the properties of the circle using the properties in the top right. I’m going to set them to the values in the image below.
Next, we’ll need another keyframe to animate to, otherwise we will just have a static image! Double click on the timeline inline with the track to insert a new keyframe at that time. Unfortunately the properties are all reset so we have to enter them again from scratch. Like before though, single left click on the keyframe and set the properties in the properties panel. This time, I will use these settings:
You can add as many other keyframes as you like and even add new tracks with their own keyframes using the steps from above, but I won’t bother.
Once done, you can close the animation editor window. Finally, to ensure the animation plays smoothly, we need to set the Animation Duration property of the Animation Layer to be the length of the animation you just created. If you set a value too small, your animation will appear to be cut off, but too long and you animation will not replay quickly.
Congratulations, you’ve made your first animation! :tada: